Facetime is a popular video call service on iOS and macOS. It helps to connect people from all around the world. The software is well renowned but is limited to only Apple devices. The application is an effective means of communication. There can be many special moments over video calls. It can be quite valuable to record the facetime calls to make the most out of those memories.
Users can register these calls effectively to view them later on. This guide aims at assisting you with the process.
Steps to Record Facetime Calls on iPhone:
Facetime is the native video call software. The application is popular among iPhone users. It is available on all the iOS devices and can be used to connect with other Apple users. Let’s have a look at the steps to record a facetime video call on iOS devices. The iPhone comes with the screen recording built in the os. It was added to iOS 11 and has made life easy for all of us. Using the facetime application requires an Apple ID. This feature can be used on all iOS devices and even iPadOS. Works with the iPhone, iPad, and iPod touch. Follow the given below guide to recording every second of your video call.
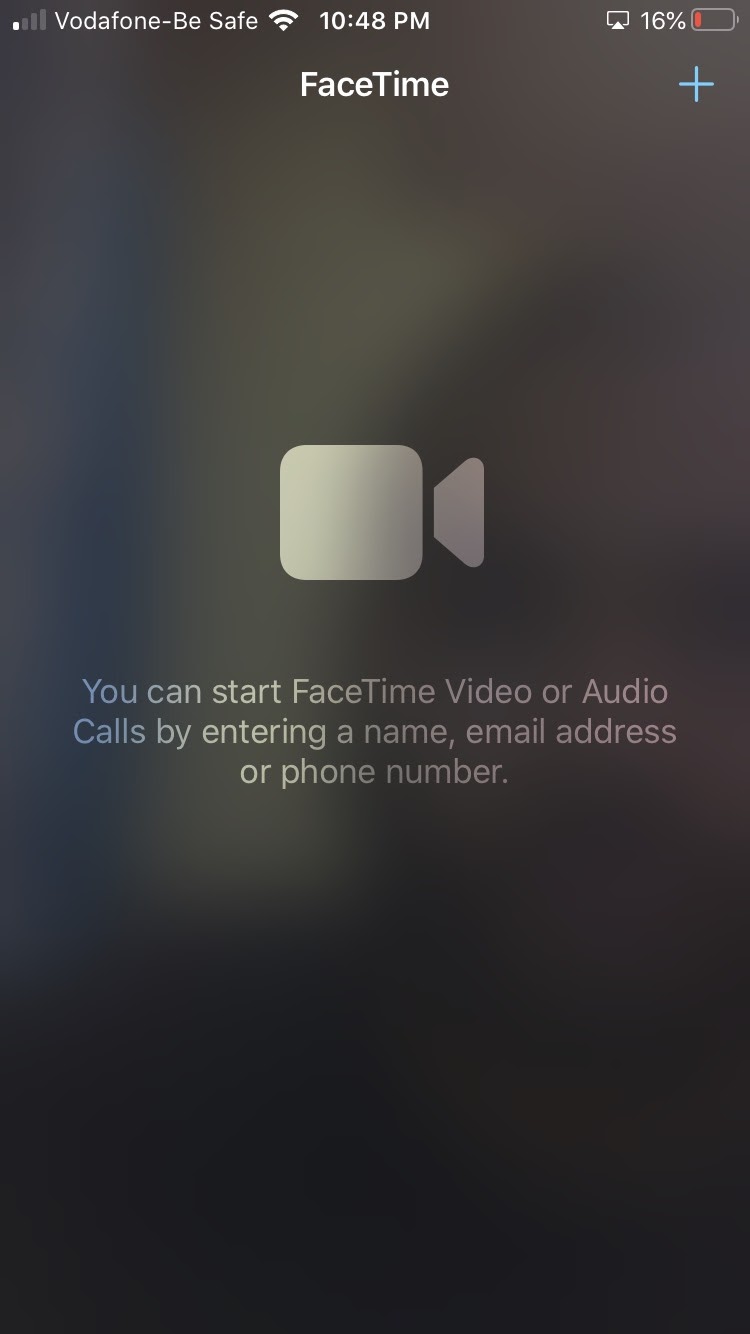
- Start the facetime application on your iOS device. Here you will find the list of your contacts and previous call logs.
- Swipe up on your iPhone to visit the control center. On iOS 11 and above devices, there will be the option to record the screen with the sound. Click on this option to start the recording.
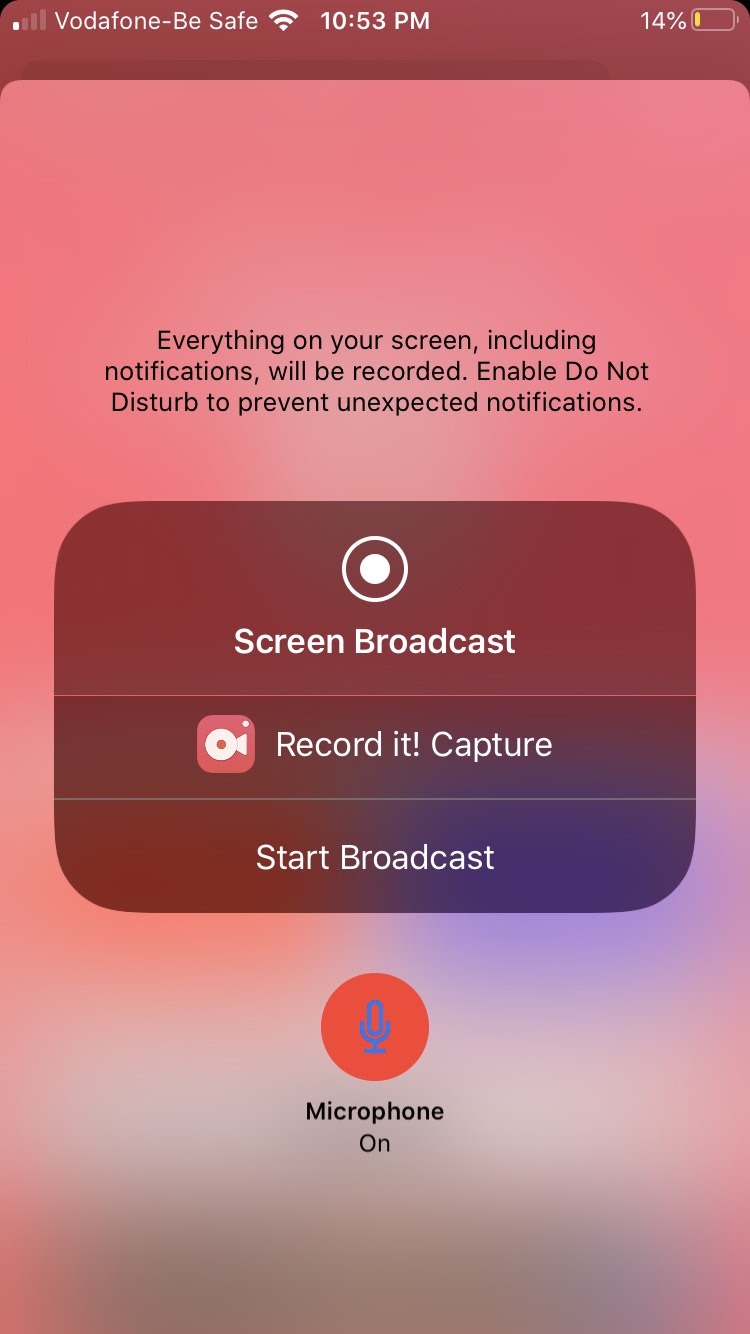
- On the recording feature, you can enable the in-app sound recording along with your microphone. It will help to capture your inputs as well as the video call audio. The recorder will automatically match all of your audio requirements. There will be a 3-second countdown to notify you when the recording starts.
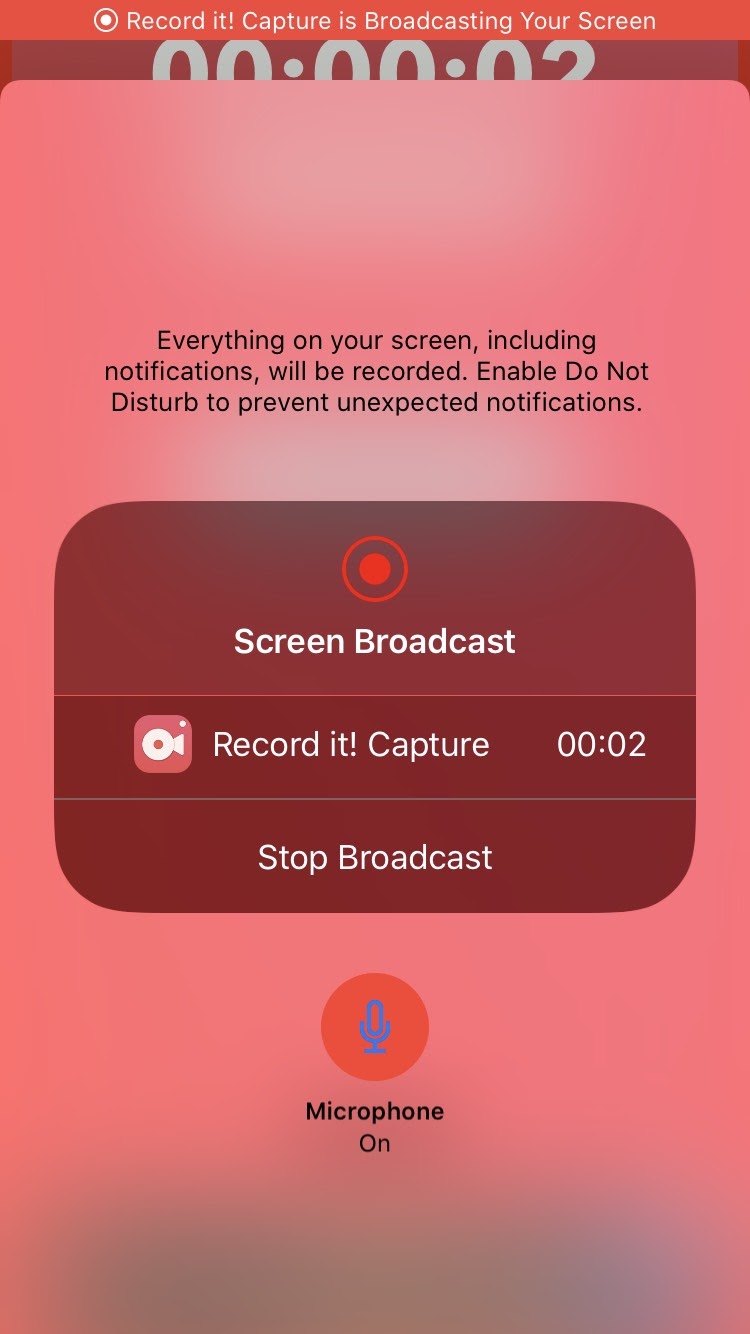
- Now you can easily make your facetime call. All of the audio and video during this call will be recorded. It is beneficial for users to keep track of their conversations.
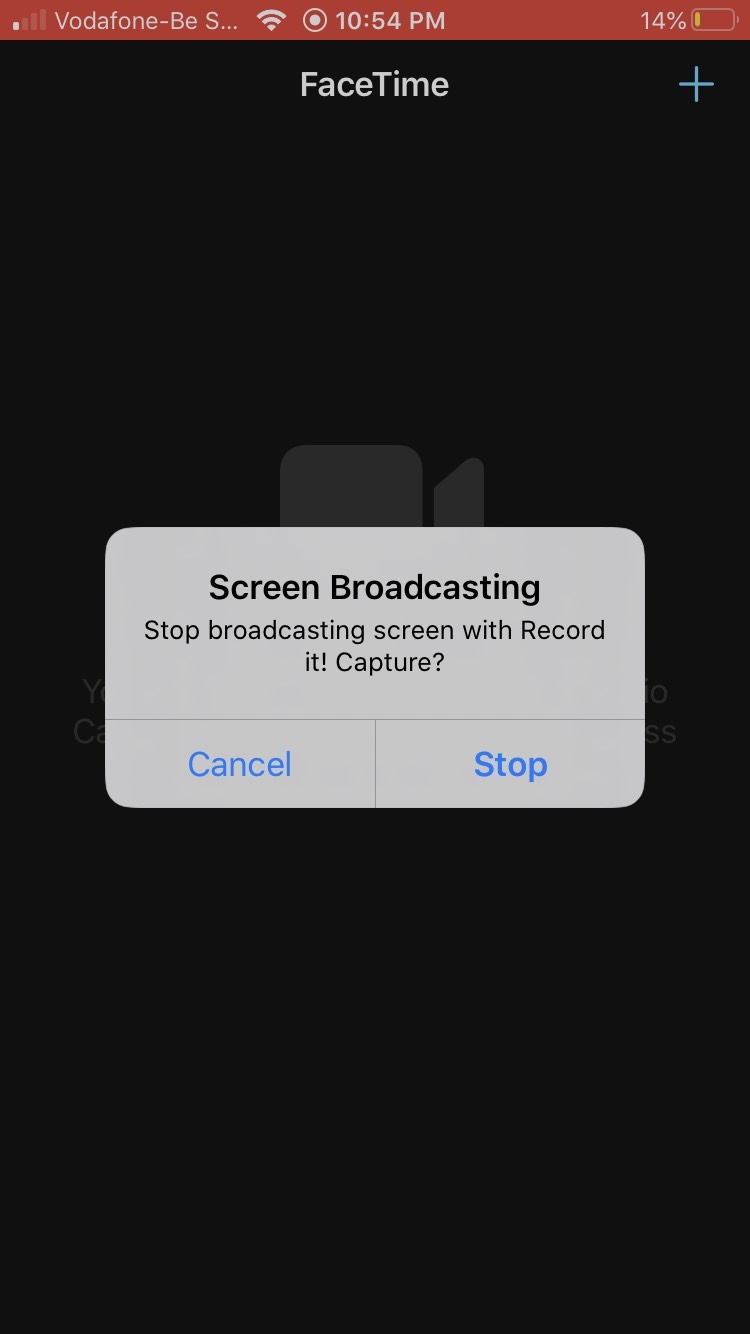
- Users can quickly stop the recording. They are running by swiping up and clicking the toggle. It will immediately terminate the record. Users can view the recording by using their photos application. It is automatically saved on your iOS device.
How to Record Facetime Calls on Your Mac?
The facetime app is available on MacBooks. The proprietary video calling software by Apple is present on all of their computing devices. With this tutorial, we’ll be recording the facetime calls on our mac devices. The facetime service is available on macOS X Lion 10.7 and upwards. We are going to use another macOS exclusive application to our advantage. The QuickTime software enables users to record their MacBook screens easily. Follow this guide to learn how to register your facetime video on Mac devices.
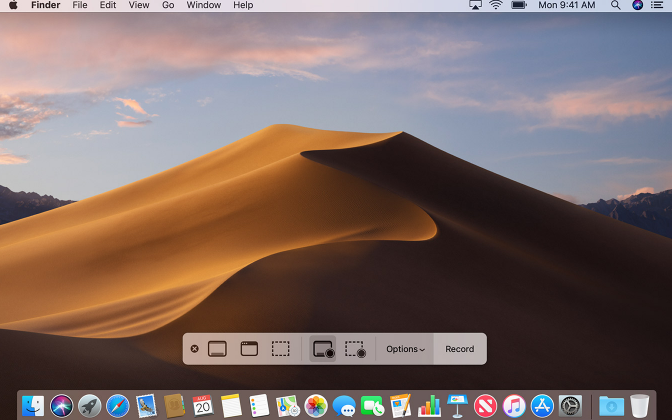
- Head over to the QuickTime window on your mac devices. Start the application from the feature list. The video player should open up. Users can find the QuickTime software on their dock or applications folder.

- Head over to the file menu On the QuickTime app. Here you can find the option to start a new recording on your device. It will be helpful for users to begin recording their entire screen instantly.
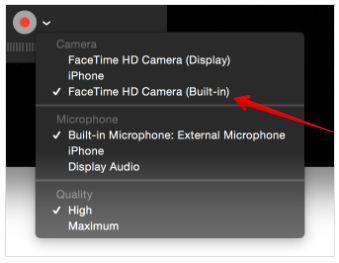
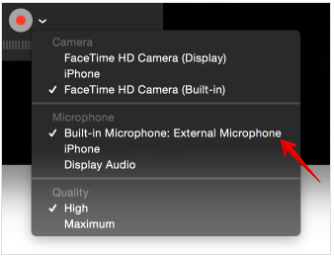
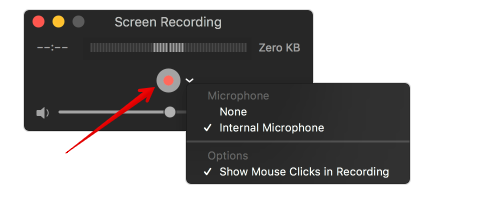
- The software will list out all the available microphone devices. In the screen recording option, you will find a lot of audio options. Here select the internal sound option to record your facetime audio.
- Now start the facetime app after you have made the recording preparations. Start your call with the person you want to connect with on the phone.

- The QuickTime software is always ready to start recording. Click on the red record button to begin with, the process. It is advisable to start the recording beforehand to ensure that every detail of the call is covered.
- Users also have the option to select the screen area or window. It is helpful for users who want to record only a specific part of the screen. Select the facetime window to record just that part of the windows.
- Users can quickly stop the recording on their Mac by clicking the stop button. This stop button can be found on the menu bar. After you finish, the recording QuickTime will start playing the video.
- To permanently save this video clip on your device, click on the file menu. Here you will find the save video option. It will help users to keep their video files easily. Users can name their video anything according to their needs. Select the file destination to view it again quickly. The video will be saved in a .mov file format.
These same steps can be used to record facetime conversations on your iPhone. It will require users to connect their iPhones using the lighting cable to their Mac. The airplay feature enables users to share their iOS screens on MacBook. It is a handy and unique feature to have in place for iOS users.
How to Record Facetime Calls on iPhone Through Windows?
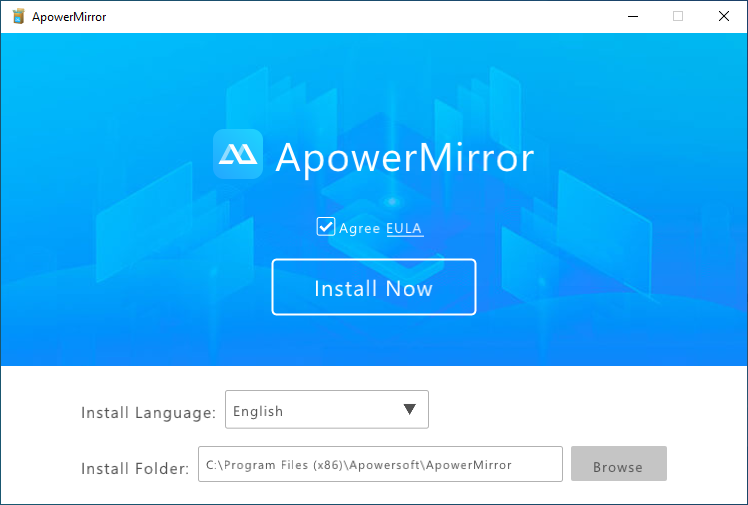
Windows is a platform that is not interconnected with iOS. It is, however, the most popular operating system in the world. Users from all around the world would love to have a platform to record facetime calls on windows. We’ll be using a third-party application to our advantage. This software is called an apower mirror, and it is available on both Windows and macOS. Enables users to mirror their iPhone screens and record them effectively. Follow this guide to get the recording on your Windows device.
- Open up your browser on the windows device. Head over to the following link to download apower mirror – https://www.apowersoft.com/phone-mirror.

- Install the application on your device. The setup wizard is quite straightforward.
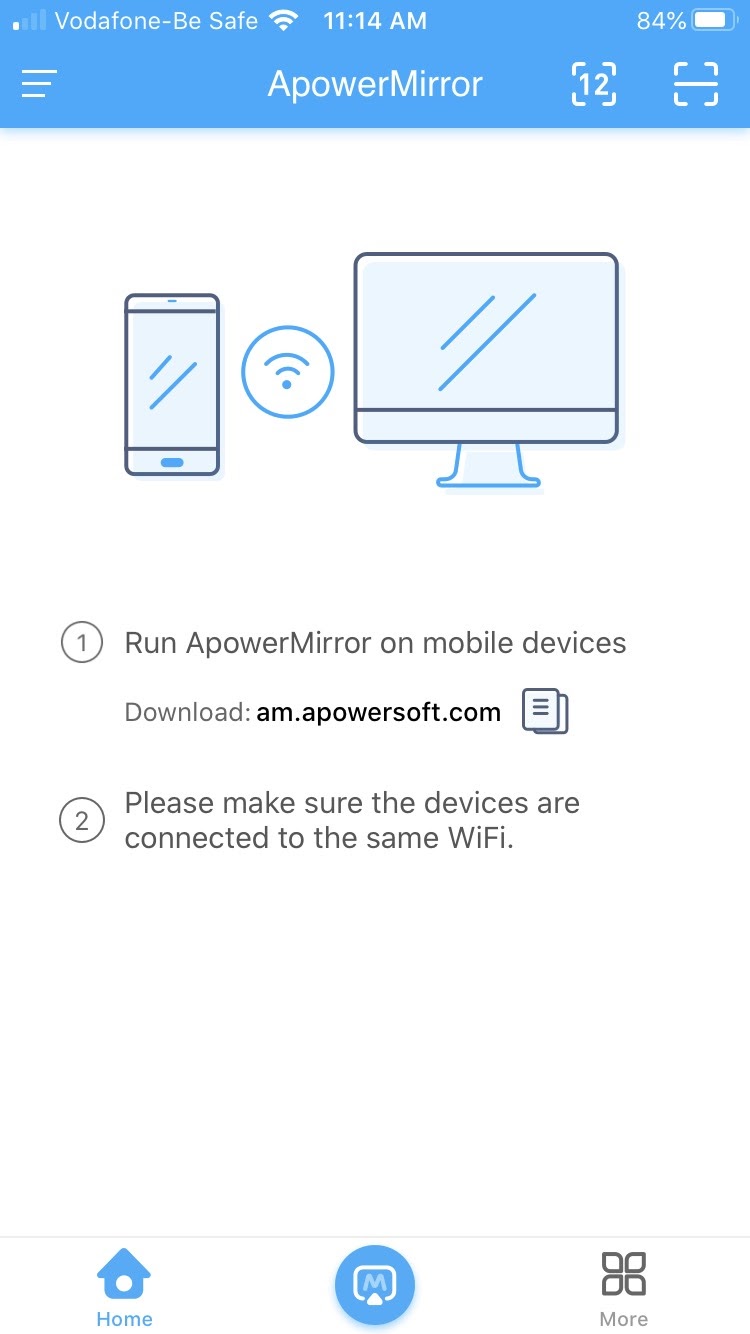
- Start the application on your windows device after the installation. It will prompt you to connect to your iPhone. The process is quite similar. Users need to be on the same wireless network.
- On your iPhone device, start the apower mirror application. It can be used to connect with your Windows PC instantly. Once the connection is successful, the iPhone will start streaming.
- Start the facetime application on your iPhone. Connect the call with your contact.
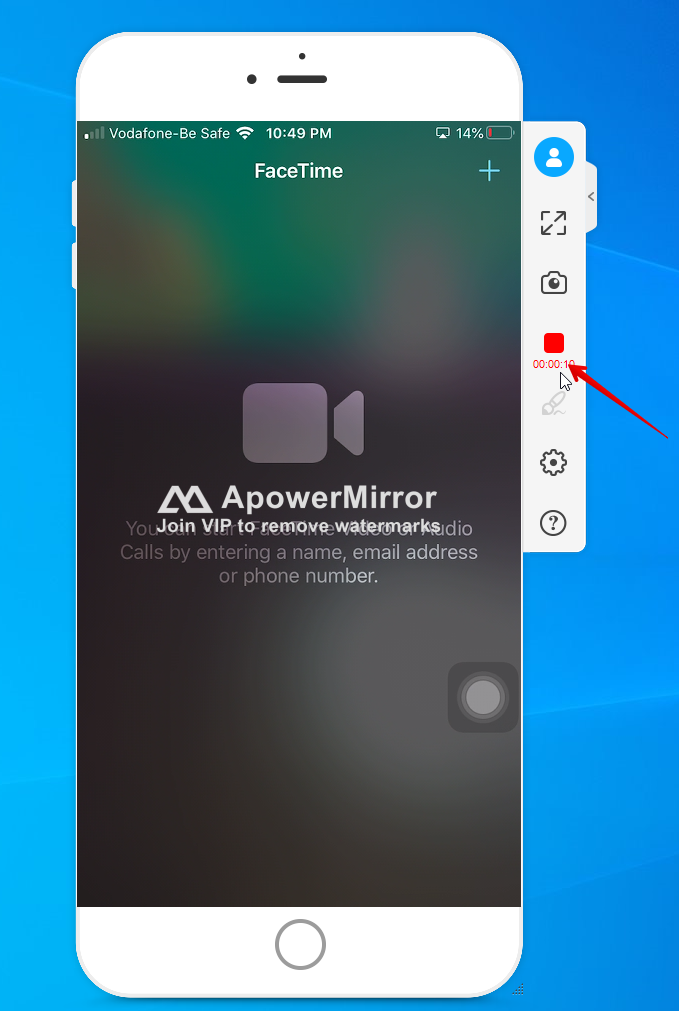
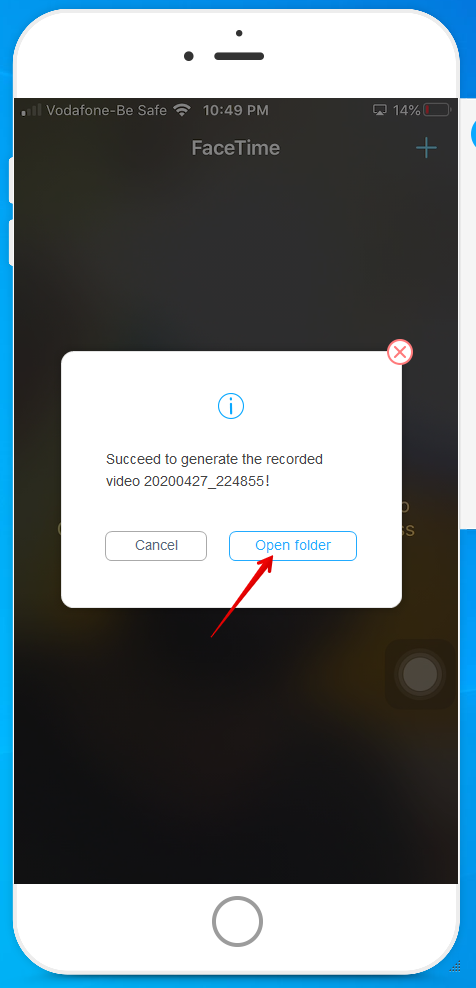
- Users can find the record button on the apower mirror software suite. Click on the button to start/stop the recording. The file will get automatically saved in your documents folder.
Voila! Now you can record facetime videos even on windows devices. It is undoubtedly going to come in handy for a lot of users.
Conclusion:
Facetime is a popular video call software. It is available on both iOS and macOS devices. Users from all around the world love the platform. Recording on iOS and macOS devices is quite easy. Their inbuilt tools make the process simple. Through this guide, we hope to provide you with all the necessary information. Follow the steps given here to record your facetime video call easily. This article includes official and third-party ways to record facetime. We have also added a tweak recording setup for Windows devices for our readers. You can always bank on us for the best workarounds.

